248
NEW FANGLED ANGLES: BANISHING HO HUM SHOTS
It's amazing how videographers will spend $25,000 or more on 3-D
Background music creates a mood or blends scenes together. Sound
Each of these dimensions communicate a mood or an environment.
Camera angles are just one more dimension, one more tool in the
director's bag of tricks for expressing an idea without actually
saying the words.
A few basics first -
If you want to make someone or something look important, bold,
aggressive, strong, or authoritative, shoot it/him/her from below. We
look up to giants. Shoot a person from slightly below eye level and
they look slightly domineering. This is the angle used to make
politicians look more authoritative. Shoot from way below eye level,
however, and the person begins to look like a bully. The same is true
for a box of soap powder. Shoot from below and it stands over you
like a tall building, ready to stamp out stains and decimate dirt.
Shoot from above an object or person and they look less imposing
and more subordinate. Again, a slight angle causes a slight effect.
A boss chastising an employee might be positioned with his eyes
slightly higher than the camera while the employee's eyes are
positioned below the level of the camera.
Things that are usually bigger than us can be made to look more
vulnerable as we shoot down on them. A cement mixer when shot from
above looks easy to stop with a small barricade. Shoot the cement
mixer from the ground and the tires appear ready to crush you. Small
products like calculators, radios, and flashlights are usually seen
from above, a shot that leaves them neutral or unimposing. Raise them
up to eye level and they gain new stature. Notice how advertisements
often depict children's toys at eye level.
People, on the other hand, are normally seen at eye level and if
shot that way, will look neutral (neither imposing or subservient).
When people are seated, it is necessary to lower the camera to their
eye level to avoid sending the subconscious message that they are
subservient. If the camera cannot get down low enough, then build a
platform to elevate your guests.
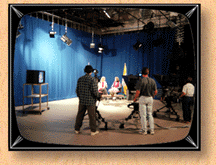
Speaking of guests, how they are positioned in the shot will
also impart a hidden message about them. Seat two people directly
facing each other, and they will look adversarial. This is a great
shot for point/counterpoint rather than a friendly discussion. Seat
both people in a straight line facing the camera, and they look like
contestants in a quiz show, ready to respond from outside force rather
than interacting with each other. The best position for host and
guest is in a V-shape where they are angled towards each other. This
shot is neutral and friendly. Remember to keep your guests and host
close together on the set as TV tends to make people look more spread
out than they really are.
And speaking of spread out, we have all heard how television
adds pounds to a person's girth. For the talent to look their best,
you don't want them to face the TV camera directly (they look too
wide), or to be totally sideways to the camera (now you really can see
those extra pounds). Again, the best shot is at an angle. The person
may face the camera but their shoulders are turned 30 to 45 degrees to
one side or the other.
This shot works well with products, too. You cannot tell the
shape of something from one side of it; a fax machine may look just
like a big rectangle when viewed head-on. Rotate the fax machine a
little and view it slightly from above and the camera now sees three
surfaces revealing that the machine has depth and substance.
If you need to get three or more people into a shot at once, the
worst way to do it is to line them up. They take up a lot of room
that way and look like little heads stretching across the screen with
wasted space above and below them. Instead, vary the heights of their
heads, perhaps putting two or three in a diagonal line while the
fourth head falls in a remaining empty corner of the screen. Watch an
episode of the "Golden Girls" where the four ladies sit around the
kitchen table. Notice that one is usually standing or another is on a
stool. Their heads are never at the same height. Notice also family
shots taken by professional photographers. Dad may be at the top with
Mom slightly lower and to the side, with the children's faces creating
another diagonal line forming a pseudo random pattern. Compare this
with the snapshots you take of your relatives lined up in front of the
Grand Canyon like cheerleaders.
How would you go about shooting children (with a camera, I
mean)? The same laws of subservience/neutrality/dominance prevail.
Because kids are short, your natural tendency is to shoot down at
them, but this leaves them looking helpless and weak. It also makes
an awkward shot if an adult is interviewing the child as the
interviewer is towering off the top of the screen or bent over like a
gargoyle while the child is disappearing off the bottom of the screen.
For a better shot, the interviewer should squat down to the child's
height making both faces closer to the same level, easier to capture
as a closeup. The camera should also pedestal down to the child's
height to yield a neutral, personal, and friendly shot.
The center is not the sweet spot -
Books on picture composition teach us about the rule of thirds
which states that the most important thing in your picture should not
be in the dead center of your screen; it should be 1/3 down from the
top or 1/3 up from the bottom, and 1/3 in from one side or the other.
If you were shooting a tight close-up of a face, you would place the
eyes 1/3 down from the top of the screen and the lips 1/3 up from the
bottom of the screen. Since the eyes and lips are the most expressive
and important parts of the picture, you want them to be in these prime
areas. A long shot of a person would probably place his face 1/3 down
from the top of the screen. Similarly, a product would not be shown
dead center on the screen, but offset in one direction or the other.
If the product fills the screen, then it's knobs or some other
important element would reside along the screen's tri-sections. Even
when you are shooting sports, you don't place the quarterback dead
center on your screen; you leave some space in front of him. The
space usually gets filled up with other action anyway.
And following the theme of being off center, think about people
facing or walking to the side. If you center them, they tend to look
like they are going to bump their faces or stub their toes on the edge
of the screen. Also half the screen is wasted showing what's behind
them. Instead, leave the person some space to talk into or walk into.
It just looks more natural for a person to have breathing space or
walking space.
The cockeyed shot -
They always tell you keep your camera level. A crooked horizon
is the sign of sloppy workmanship. When the world is level,
everything seems stable --- this too is a neutral shot.
Tilting the camera clockwise or counterclockwise a little
imparts energy, excitement, and movement to the image. Car ads are
full of this (and other stuff too). You'll always see cars whipping
diagonally across your screen, effortlessly climbing 40°
hills, or
hurtling down treacherous canyon passes. Horror flicks use this angle
too: the young lady always seems to be running through a tilted
graveyard. The determined soldier always seems to be marching at an
angle. The giant never approaches straight on, but always is sprawled
across the diagonal of the screen as we look helplessly upward.
MTV, VH1 and C/NET Central all overuse this angle to impart fake
excitement to their stories. It exhausts the senses to watch the same
tired interview shot through a handheld camera tilted first at this
angle and then that, dollying in and dollying out for no apparent
reason. It would almost seem that the cameraperson had to tinkle
while waiting for the interview to end.
The interview -
I'm not spending all these electrons on the subject of talking
faces because I like this kind of television; I abhor it and would far
prefer to see things shown to me rather than told to me. Nevertheless
I am resigned to the fact talkie vision is the mainstay of corporate
and industrial TV, probably because it is cheaper and faster to
produce than doing a good job. So on we go to the interview.
If you cannot interview a person while he's doing something or
going somewhere, at least interview the person in the right habitat.
Surround the person with the gadgets of his/her trade or in front of
the backdrop of his/her work. A forest ranger would appear to be at
home with one foot propped on a fallen log with a canyon or stream in
the background. A firefighter might have a burnt building or a fire
engine in the background. A live fire with screaming children would
be good too, but may be difficult to stage. And your background may
upstage your interview.
Setting up these shots requires forethought as to where crowds,
sunlight, and noise will come from. Plan your lighting with attention
to how it will be when you are actually taping. Will you need lights,
reflectors? Will the distant shot you plan now by the light of the
sun be totally lost when it is illuminated only by the lone bulb on
your ENG camcorder? Be aware also that the backgrounds which are dark
but not black will probably appear black to the camera once you have
illuminated the talent. On the other hand, waiting for government
buildings to be illuminated by floodlights can pay off nicely in a
political interview.
Be aware that the bus terminal that is quiet at 3 pm may be
crowded at 5. Then, maybe you want the noise and crowds --- it adds
life and excitement to the scene.
It's no fun to interview the talent when some clown slips into
the background to wave "hi" to mom. Or, when a parade marches across
the scene between you and your performer. Possible solutions to the
background/foreground problem:
1. After making the establishing shot, zoom in close on the talent so
that little of the background can be seen.
2. Place the talent in front of a bush or wall so that no one can get
behind him. Standing in front of a fountain or canyon controls
background crowds nicely.
Watch out that you don't position a fountain or lamp or painted
scenery so that it spouts or sprouts from the talent's head. No one
will hear the interview over the laughter. And don't shoot with a
clock in the background; everybody will tune out the interview and
muse to themselves, "Look, they shot this at 4 in the afternoon." And
if you shoot all day and edit the clock sequences together, your
viewers will have a field day pointing out the time changes to each
other.
To avoid foreground crowds, place something on the ground
between you and the camera that no one wants to walk on: again a
fountain, canyon, open sewer, hot coals, or a tangle of TV wires and
junk. Too low in the shot to be seen, these barriers will thwart all
but the most persevering parvenus.
Fancy camera angles -
Here are some I like, and like spice, use a dash here and there,
never a whole bottle full.
1. Start with a nearby object and change focus to the distant object
to begin the scene. Vice versa works too.
2. Shoot through something, like a window, waterglass, or fishtank,
moving the camera to a clear area to reveal the unobstructed scene.
3. Start the scene with a reflection, as in a mirror, pan lid, beach
sunglasses, plate glass window, or pool of water. Again, move the
camera from the reflection to the real scene.
4. Shoot from ground level. Wheels, walking feet, and golf balls are
pretty fascinating from ground zero. The wheels and feet can give a
sense of traffic without requiring you to hire 99 extras for your
shot. The camera positioned at the far side of the cup enjoys the
best seat in the house for viewing the perfect putt. For best results,
adjust your lens for wide angle and find a way to prop your camera on
the ground. (If you don't have a low angle tripod called a "high
hat", a small bean bag or a sand bag comes in handy for cradling your
camera.)
Low wide angles exaggerated speed. I remember making a video
tape for may college on the anesthetic topic of campus driving safety.
I needed to show the dangers of blind corners, dodging bicyclists, and
surprise construction barriers without risking my own car in any high
speed stunts. I didn't have any mechanism to speed up the video, and
besides, that effect would have looked hokey. The solution: I
mounted the camera low on the front bumper of my car and shot near
misses at a safe 10 mph. The results looked very convincing.
For other low angle moving shots try:
a. Duct tape your camcorder to an upside down carpet and push it with
a broom across a slippery floor.
b. Set you camcorder on a model railroad track; you can even go
through tunnels.
c. Affix your camcorder to the axle of a shopping cart, or footpad of
a wheelchair, a furniture dolly, chair dolly, skateboard, toy trucks,
anything with wheels.
Incidentally, low angle shots make toys look like the real
thing. To avoid depth-of-field problems found when shooting models,
use a wide angle lens and flood the area with light allowing you to
shoot at f22.
5. Shoot from the deck of a pickup truck or some other high vehicle
to de-emphasize speed when traveling.
6. Birdseye views from balconies and cliffs are nice, but beware of
how easy it is to become disoriented when viewing the world through
your viewfinder. You don't want to lose your balance or take a step
into the abyss. If you wish to give your viewers cardiac arrest, hold
the camera at arm's length in front of you (forget the viewfinder),
and swing the camera out over the rail of a balcony or precipice. Aim
the camera downward enough so that the rail of the balcony or edge of
the cliff slides out from view. This shot also begs for a wide angle
to magnify the feeling of motion. And to really go overboard, mount
your camera to a 2' x 4' and swing the whole works over the edge.
7. Travel parallel with another vehicle, runner, speedboat, or
animal. It is more engaging to have the camera traveling along side
the moving subject than it is to pan the camera sideways following the
subject. The traveling shot has more adventure than the stationary
shot. Be sure to include some background in the shot so that your
viewers know the subject is really moving. Shooting a horse and rider
from a low angle, for instance, might leave the two of them with a
background of sky or distant mountain that never moves, losing the
illusion of speed.
8. Try a point of view (POV) shot representing either the person or
the object. For instance, you can dip a camera down to the top of an
ice cream cone. On the other hand, you can, at wide angle, view a
face swooping down with an opening mouth with a giant tongue slipping
out. This same shot could occur from the inside of an empty ice cream
canister. Simply clean out the canister and cut a hole in the bottom
and shoot the camera up through it while the hungry diner comes into
view inside the rim of the can and reaches the scoop towards the lens.
The same trick works with a gift box where the camera shoots up
through the box with a lid on it and views the lid being removed as a
surprised face comes into view.
Pin the tail on the donkey can be viewed from the donkey's
perspective as the blindfolded contestant comes rushing forward with
an arm waving in ever closing circles towards the lens. On the other
hand, we could be looking down the player's arm holding the donkey
tail as it passes by fleeing guests meandering its way eventually to
the target.
From an educational standpoint, psychological tests have found
that it is more instructive to demonstrate something from the
point-of-view of the doer rather than an onlooker.
9. If you wish to take shots from a bicycle, skateboard, or show the
point-of-view of a skier as he/she slaloms the slops, try using a
miniature camera that can be strapped to your head. HeadTrip, Inc.
(430 West 34th Street, NYC 10001, phone 212-629-4004) makes a 3 ounce
camera that attaches to a helmet or headband, and sends its signal to
a 4.5 pound fanny pack that holds the recorder and monitor. The
package costs about $4200.
If traveling through miniature models and dioramas is your bag,
try a long barrel probe lens system such as Innovision Optics (Santa
Monica, California) Probe II. Such a lens lets the operator get over,
under, and even through small objects.
Creative camera angles provide not only a feast for weary eyes,
but speak directly to the subconscious of your viewers. Go back over
your scripts looking for places to add a new fangled angle.
Ways to shoot a talking face (or, ways to shoot the talent while the
talent is shooting off his mouth) -
Videographers steeped in traditional video production hardly
need a pep talk on camera angles; these skills are an established part
of their visual repertoire. Multi-media producers, on the other hand,
may come from another background, one that thinks that talking faces
are exciting. Dishwater is exciting. Dietetic lollipops are
exciting. The waiting room at the muffler shop is exciting. Talking
faces are not exciting.
If you absolutely, positively have to shoot a talking face, is
there any way to spice it up? Yes, dozens. Hundreds even. Here are
a few:
Everyone likes to go for a journey. See that your talking
talent travels as he babbles. The camera could be in front of him as
he walks towards the camera (the camera operator walks backwards).
Shoot the talent from the passenger's seat as he drives his car. This
is especially appropriate if we are being taken to see something. The
camera could be positioned on the car's floor shooting up at the
driver or mounted on the car's hood (the microphone is inside the car
of course, and a polarizing filter will reduce the shine from the
windshield).
For more camera angle ideas, go to
People who do things are always more interesting than people who
stand with their hands in their pockets, so try to get your performer
involved in doing something. This is certainly appropriate when
people are holding items they are discussing. The scene of a park
ranger lecturing on the importance of heavy duty climbing shoes
becomes more dramatic as we zoom out and find the ranger clinging to a
6-inch wide trail above the Grand Canyon. But the shot also works if
a person is doing something totally unrelated to the subject. For
instance, one could interview Judge Ito pruning his roses in a dirty
sweatshirt.
sell a couple excellent instructional tapes on the subject.